Main types include standard combiner boxes (DC consolidation), disconnect combiner boxes (emergency shutdown), AFCI combiner boxes (arc fault protection for fire safety), and AC combiner boxes (for inverter aggregation in large systems). . A solar combiner box is an electrical enclosure that consolidates multiple solar panel strings into a single power source before connecting to the inverter. This device plays a significant role in both residential and commercial solar installations, particularly when. . Learning how to wire solar panels requires learning key concepts, choosing the right inverter, planning the configuration for the system, learning how to do the wiring, and more. In this article we will teach you all of these, saving you weeks if not months of hard studying on the subject. The. . Table 19 (*) Conductor type RPV is not permitted for cable tray installation, unless marked (TC) or equivalent. (**) Provided that conductors are serviced by a qualified person, and inaccessible to the public.
[PDF Version]
As a rule of thumb, we recommend minimizing electrical wire lengths to around 25 meters (82 feet) if possible. The longer the wire distance between the solar panel, charge controller and batteries, the more resistance will exist and the less effective your system will be. . The distance you can run these wires affects not only the overall performance of your solar energy system but also your return on investment. We will delve into the. . When the length of the cable is long for a certain current flow and wire size, the electrical voltage that will reach the load, whether it is charge controller or inverters, will be less, and the device may not work to charge the batteries properly, as the charge controller is not designed to. . If that's a question you've been pondering too, you're in the right place! The answer may surprise you. Using undersized wire in your solar installation can result in dangerous overheating, significant energy losses from voltage drop, and costly equipment failures. Whether you're installing. .
[PDF Version]
Required grounding equipment includes copper-clad ground rods (5/8 inch or 3/4 inch diameter, 8-10 foot length), grounding clamps, UL2703 certified bonding products, and listed terminal bars. Ground rod spacing requires minimum 6 feet separation between electrodes. . Many modern grid-tied installations use ungrounded PV arrays paired with transformerless (non-isolated) inverters that establish a functional ground reference and rely on electronic ground-fault detection. Solidly grounded PV source circuits remain a permitted configuration and are still used in. . If separate grounding systems and grounding electrode conductors (GECs) are installed in a structure or different buildings, they should be combined at a common point (busbar or terminal) and connected to the common grounding electrode system. The main bonding jumper (MBJ) and grounding electrode. . Solar PV grounding systems require specific equipment to meet National Electrical Code (NEC) safety standards under sections 690. This simple yet critical detail can save you time, money, and headaches down the road. Whether you're a DIY enthusiast or just want to understand the process better, this. . The NEC is the primary guiding document for the safe designing and installation practices of solar PV systems in the residential and commercial markets in the United States.
[PDF Version]
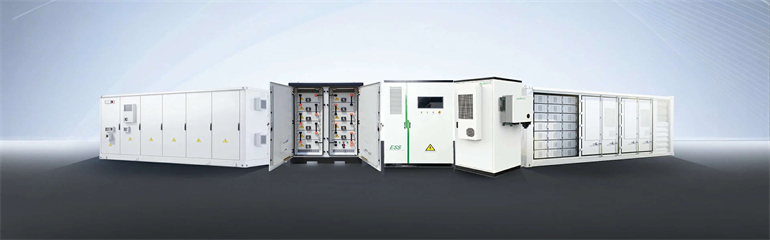
Unlike solar panels with 25-year warranties, combiner boxes typically last 8-15 years depending on three key factors: "We've seen coastal installations require replacements 40% sooner than desert systems due to salt corrosion. " - EK SOLAR Field Engineer Report. Wire Management Directly Impacts System Economics: Proper wire management reduces LCOE through decreased O&M costs, higher system availability, and extended component life. Quality wire management systems can reduce installation labor by up to 30% through tool-free installation and pre-planned. . Wondering about the lifespan of your solar system's critical components? This guide explains when and why to replace photovoltaic combiner boxes, helping you optimize maintenance costs and energy output. Within the junction box are connectors, terminals, surge protection devices, and sometimes fuses or grounding wiring. Photo from Gerald Robinson, Lawrence Berkeley National Laboratory (LBNL) Issues with DC-string cabling (wiring) on solar photovoltaic (PV). . ich is basically in line with the FIT (feed in tariff) time of 20 years. To ensure the return on investment, all components – from the panels to inverters – should ha in extending the lifetime is the right selection of the enclosure size.
[PDF Version]
For rooftop PV installations, you can use the PV wire, known in Europe as TUV PV Wire or EN 50618 solar cable standard. . Quality wire management systems can reduce installation labor by up to 30% through tool-free installation and pre-planned routing strategies. Environmental Durability is Critical for 25+ Year Performance: UV-stabilized materials and stainless steel components must withstand continuous environmental. . Prepare Solar Panels for Wiring: Attach the MC4 connectors to the solar panel cables. Connect the Solar Panels: Begin the wiring process by connecting the positive terminal of one solar panel to the negative terminal of. . Proper solar panel wire sizing is critical for system safety, efficiency, and compliance with electrical codes. ESTEL is here to support you every step of the way with expert advice. In this article we will teach you. . EZ Solar Junction Box- https://geni. us/qpbAhb2 I will walk you through how I routed a. .
[PDF Version]
Strip the wires: Use wire strippers to remove about half an inch of insulation from the ends of your wires. Be careful not to damage the copper strands. But here's the kicker: nearly 23% of solar system underperformance cases stem from degraded wire connections, according to the 2024 NREL Field Operations Report. With solar installations increasing. . For significant damage, replacement of the cable section is the best course of action: Cutting the Damaged Section: Use wire cutters to remove the damaged section. Preparing the Cables: Strip the ends of the remaining good cable and the new replacement cable. Soldering involves joining two or more. . As long as the damage to the solar panel is limited to microcracks or faulty wiring, they can typically be repaired.
[PDF Version]