Standard Installations: For most residential solar panel installations, spacing the rails about 4 feet apart is common, providing adequate support while allowing for efficient energy capture. . As a general rule of thumb, rail spacing typically ranges from 3 to 5 feet apart. However, it's essential to consult the manufacturer's specifications and local building codes to determine the appropriate spacing for your specific installation. In this example, we use a Maysun Solar module with a width of 39. The optimal spacing between solar mounting rails depends on various factors such as the size and weight of the solar panels. . Installation Guide / SolarRoof, SADL Bracket A1 1 Code-Compliant Planning and Installation Guide V2. 0 is the minimum distance between PV solar panel and roof edge of "2 x s", where "s" is the gap between the underside Cap for Elite Rail ER-I-55 SADL Bracket A1 ER-I-05 Tin Interface ER-I-05/CM Tin. . The use of patented aluminium base rails, Z-Module technology and telescopic mounting technology eliminates custom cutting and enables fast installation. Please review this manual thoroughly before installing PVezRack® SolarRoof. For this purpose, the distances of the rows from each other are determined. .
[PDF Version]

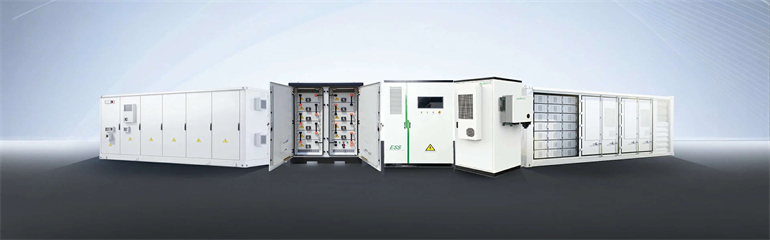
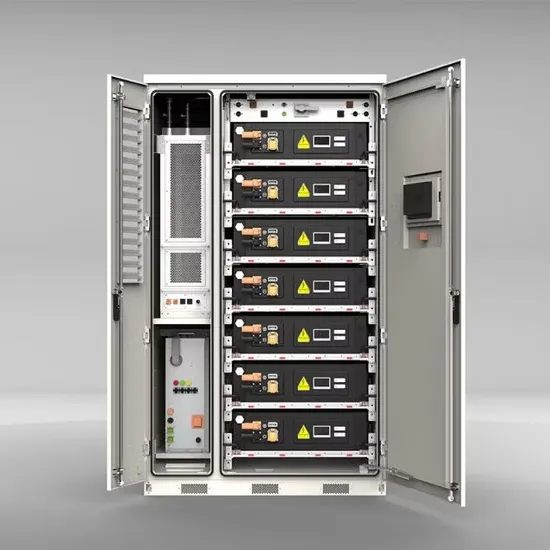
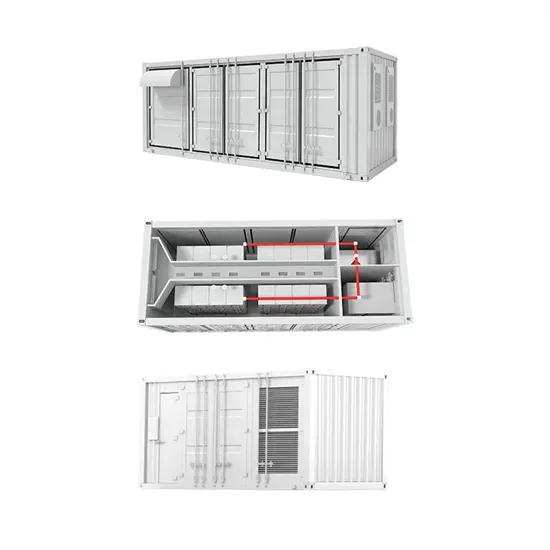
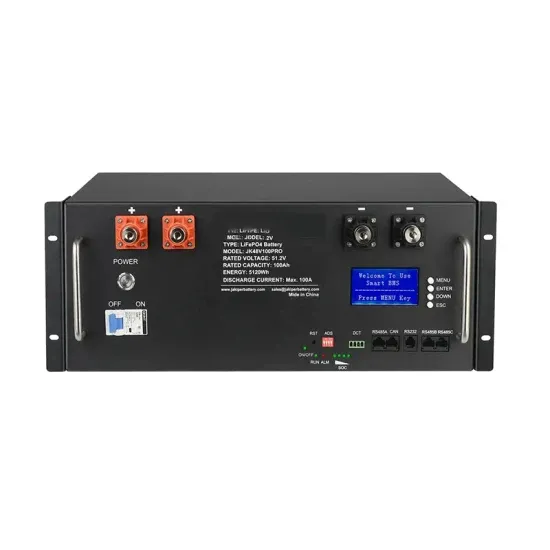
Installing a PV combiner box. Why you need one for your solar array! #748. ance cables by combining strings at the array locat ciency, reliability and safety in solar energy systems. They enable centralized management in large-scale and remote installation ity), equipment aging, and poor installation practices. global/pv-combiner-box/ 0:00 Solar combiner box 0:10 Start to assemble 0:14 DC Fuse - 1000Vdc 16A 0:15 DC MCB - 1000Vdc 16A. . recautions must be observed. It calls attention to a procedure or practice, which, if not correctly performed or. . Before installing and connecting the combiner box to the inverter and other equipment, read carefully all handling and safety instructions in the installation guides that come with the inverter and the equipment. Switch off the inverter ON/OFF/P switch and the DC safety switch. It also serves to protect the system by providing overvoltage protection and ensuring safe. . Our DC combiner boxes offer users the possibility to integrate short-circuit and overvoltage protection, as well string monitoring solutions (I,V, T and SPD and switch isolator status), for PV systems using central inverters with PV panels in trackers and fix tilt systems. Weidmüller offers a. .
[PDF Version]
Follow these step-by-step instructions to ensure proper installation: Clean the bottom edge of the solar panel thoroughly to remove any existing dirt, sludge, or debris. Ensure the surface is dry and free from moisture before proceeding. Hold the clip with the drainage opening. . Photovoltaic panel water guide clip, click and click, drainage and mud guide, improving power generation. (hereafter referred to as "GCL” Solar). Installers should follow all safety precautions described in this guide as well as local codes when installing a Module. But, it"s important to think. .
[PDF Version]
This guide offers a structured overview of the process for securing industrial land and the necessary permits for a solar module factory in Mali, focusing on the country's designated economic zones. . Given the insufficient hydraulic and thermal resources in Mali, the hybrid photovoltaic system coupled to the grid is necessary and natural. This study aims to rise the involvement of renewable energy sources to Mali's national electricity production and pave the way for a good supply of. . This first phase of the project will promote rural electrification through isolated solar photovoltaic (PV) green mini-grid systems as a low-carbon and resilient solution to the effects of climate change in the energy sector of Mali. Recently, Felicity Solar's Mali branch held an offline installer training session to help local partners become more. .
[PDF Version]
Installing the Stainless Steel 304 Solar Panel Water Drain Clips is a simple, tool-free process designed to optimize your solar panel performance with minimal effort. Follow these step-by-step instructions to ensure proper installation:. for Various Applications: This versatile solar panel clamp is suitable for rooftop, ground, and field photovoltaic installations, supporting efficient drainage everywhere. See more product details Help others learn more about this product by uploading a video! CYRENT 0XXI2R971MNCD457Q3V9907Y8 9. If playback doesn't begin shortly, try restarting your device. Videos you watch. . Solar drainage clip, a product that can improve power generation efficiency, small volume and large energy. Adding eight inches for mid-clamps and two inches for end-clamps results in a minimum of 294. This work has grown to include cost models for solar-plus-storage systems. NLR's PV cost benchmarking work uses a bottom-up. . Includes initial monthly payment and selected options. The enhancements that you chose aren't available for this seller.
[PDF Version]
Dive into the world of solar installation with our comprehensive video tutorial on Trinasolar's Vertex modules, tailored for non-utility scenarios. Trina Solar does not assume any responsibility for loss, damage, injury or expense resulting from the improper installation, handling, use or maintenance. Professional installers should read these guidelines carefully nt international electrical standards. This guide is designed to help both professionals and DIY enthusiasts understand the step-by-step. . on gli inverter più diffusi. Attraverso progressi raggiunti nella lavorazione del vetro, ques ntial, a d utilit installations. Ninet convenient smart energy. . Trinasmart 3simple steps: 1Confi gure the System Before Going to the Site 2Install the Management Unit and Gateway 3Install the Optimizers and verify system 3 Installation and Safety Manual Trinasmart Table of Contents Read This First / Safety Instructions. .
[PDF Version]