Creating a compliant pv system single-line diagram (SLD) is a critical skill for any electrician working in solar. This diagram is the electrical roadmap of your photovoltaic installation, providing a clear, concise overview of the entire system for the Authority. . The single most important tool in your arsenal is a solar panel wiring diagram. This is your non-negotiable blueprint, a detailed map that ensures every component works together safely and efficiently. Schematics is one of the more technical parts of DIY solar, but it doesn't have to feel like. . There are three main wiring configurations (see the diagrams below): To wire the panels in series you connect the positive terminal of one device to the negative terminal of the next one. With this connection, voltage adds and current stays the same as with a single panel.
[PDF Version]
In this guide, we'll walk through how to design your wiring layout, the essential components you'll need, and how to interpret or create diagrams for both grid-tied and off-grid systems. This diagram will serve as a blueprint for your project, helping you plan the placement of each panel and ensure an efficient and effective installation. The first. . One very important step when constructing your own solar setup is putting together a solar panel wiring diagram (or schematic). Schematics is one of the more technical parts of DIY solar, but it doesn't have to feel like. . Learning how to wire solar panels requires learning key concepts, choosing the right inverter, planning the configuration for the system, learning how to do the wiring, and more. These mounts are available in 3 main types: Flush mounts. These technical drawings are required by most jurisdictions for permit approval and serve as the primary installation guide for. .
[PDF Version]
Connect the solar panel cables to the positive (red) and the negative (black) PV terminals. Secure the PV connections tightly. . This guide provides an actionable framework to master the solar-to-inverter connection, ensuring maximum efficiency and compliance every time. The global solar market is expanding rapidly, with projections showing steady growth of around 5. However, this growth. . Wiring solar inverters isn't rocket science, but it can be shocking—literally! The secret? Always connect the battery and DC inputs first, then the AC output. Get this order wrong, and you might fry your gear. Before you touch a single wire, laying out a clear plan ensures you have the right components and a roadmap for a. . No description has been added to this video. Following this coding is crucial for proper installation. Let's say you're setting up a small solar system with a 10-panel array, each panel boasting 300 watts.
[PDF Version]
This guide breaks down how to read a PV system grounding diagram in under 10 minutes. Whether you're reviewing a plan set or prepping for an AHJ inspection, these tips will help you avoid costly mistakes. Mechanical connectors can be mounted to a module or racking frame with lay-in features which accept a copper wi e that bonds and grounds components, said Zwit. PV. . Photovoltaic panel ground wire fixing metho y must be bonded with the building equipment ground. Traditional: Daisy Chained Copper Wire between co ponents. What Is a PV System Grounding Diagram? A PV system grounding diagram is a dedicated part of. . Grounding a solar photovoltaic (PV) system involves establishing a low-resistance conductive pathway that connects the non-current-carrying metal components of the array to the earth. This pathway safely directs electrical current away from the equipment and structure in the event of an electrical. .
[PDF Version]
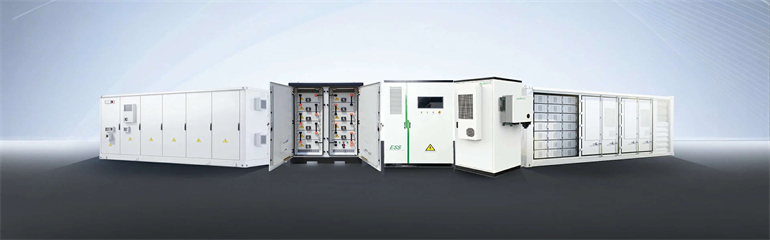
If you've ever stared at an energy storage wire assembly method diagram feeling like it's hieroglyphics, you're not alone. . Industry standards such as IEEE 1547 create a set of requirements that can be certified by Nationally Recognized Testing Laboratories for use on the Area EPS. However, many of the functionalities in Energy Storage Systems that are important to the Area EPS have no governing standard that they can. . Powerwall 3 is a fully integrated solar and battery system. A single point of disconnect (breaker /. NOTE: Customer should discuss project plans with. . ing diagram is classi ied into two major types: 1. A Single-Pole switch circuit allows you to control the flow of energy to a load such s a lamp, light, ceiling fan, and so on from a. Without a well-crafted wiring diagram, even the most advanced solar setup can falter. .
[PDF Version]

As a rule of thumb, we recommend minimizing electrical wire lengths to around 25 meters (82 feet) if possible. The longer the wire distance between the solar panel, charge controller and batteries, the more resistance will exist and the less effective your system will be. . The distance you can run these wires affects not only the overall performance of your solar energy system but also your return on investment. We will delve into the. . When the length of the cable is long for a certain current flow and wire size, the electrical voltage that will reach the load, whether it is charge controller or inverters, will be less, and the device may not work to charge the batteries properly, as the charge controller is not designed to. . If that's a question you've been pondering too, you're in the right place! The answer may surprise you. Using undersized wire in your solar installation can result in dangerous overheating, significant energy losses from voltage drop, and costly equipment failures. Whether you're installing. .
[PDF Version]